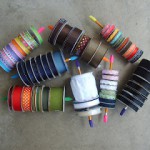
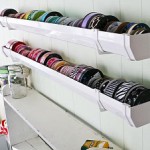
Ever wonder what people really do with all those ribbon rolls?
Here’s an idea to get your creative juices flowing: wedding ribbons!
Time to bring out all those ribbon rolls again, and the project this time is weddings. Whether it’s for your wedding or a friends, ribbon rolls are at it again! You’ve incorporated these little gems into pretty much everything you’ve done for the wedding. From flowers to trinkets to decorations, these wedding ribbons are everywhere. Here’s a few more ideas to use up all those little strips still laying around.
While the traditional wedding throws rice or confetti at the departing couple, why not have something a little more clean up friendly? Create your own ribbon wands.
Such a simple project. Find a dowel that will comfortably fit an anyone’s hand. Each dowel can be painted to the wedding colors. Sand the dowels a bit so that there is nothing sticking out of them. Take the ribbon roll strips and trim them to the same size of the dowel. Choose as many as you want and secure them all to one end of the dowel. This can be done with either hot glue or adding a small screw to the end of the dowel.
 Another great idea for sending off the couple onto their happy journey is bubbles. This one is especially a great idea if there are a lot of children, whether it be age or attitude, at the wedding. Find yourself some of those little bubble containers at a party store. Sometimes these come in colors or just clear. Either way, add paint, glitter or anything else to make it personal. Then secure a single strip from a ribbon roll around each container with a simple bow. What a unique and great way to provide trinkets for your guests to take home! You can even choose to add a little saying onto the container with a card or pen such as, “Blow bubbles of wishes, blow bubbles of fun, let’s cheer on the newlyweds as two lives become one!”
 The final idea here is to take a bunch of the bridal flowers and secure them into curtain by hanging them from ends of strips of the ribbon rolls. Colors are especially fun on this one as you can make a great statement with all the colors of the rainbow or stick to the wedding colors.
Whatever your choice to finish up those ribbon rolls, make sure it fits with the mood of your wedding!


 The last idea is super cute and also really easy! Cut three to four 5-6 inch pieces off a